

It’s been some time since I last posted an faq so here we go!
I received a question that went like this: “please please please post some editing tips!”
Now, I’m pretty sure what I do isn’t any more special than what the next photographer may do. I don’t have any fancy formula. When it comes to post processing and editing, I want to do two things 1) be efficient and 2) enhance the photo without greatly altering the look of it. I want photos to have a natural, fresh feel and ensure that years down the road, they still look like photos. In order to provide my clients with great images, with a quick turn around, that means I need to shoot well in-camera; look for flattering light, natural reflectors, watch my exposure, and so forth. In the past, I’ve tried out Photoshop and Lightroom actions and while they can provide truly lovely enhancements, I’ve opted for a simpler route that I feel is true to my style.
I do probably 98% of my editing in Lightroom by following these steps:
1. In the develop window, apply a basic preset that I’ve created that I can apply to all of my imported photos (this includes brightness & contrast adjustments, minimal clarity & vibrance adjustments, sharpening, lens correction and a slight adjustment under split toning – highlights)
2. I then go back to the library window and under the library tab, I go to previews > render standard sized previews (another time saver!).
3. Back in the develop window, I scroll through the catalogue adjusting each image as I see fit, checking for white balance and exposure and perhaps other small tweaks.
4. Once the images have been edited, I export and sharpen for either screen or print, at the low setting.
And that’s all :) From a few recent shoots I’ve pulled some before and after images to show you exactly what this looks like…
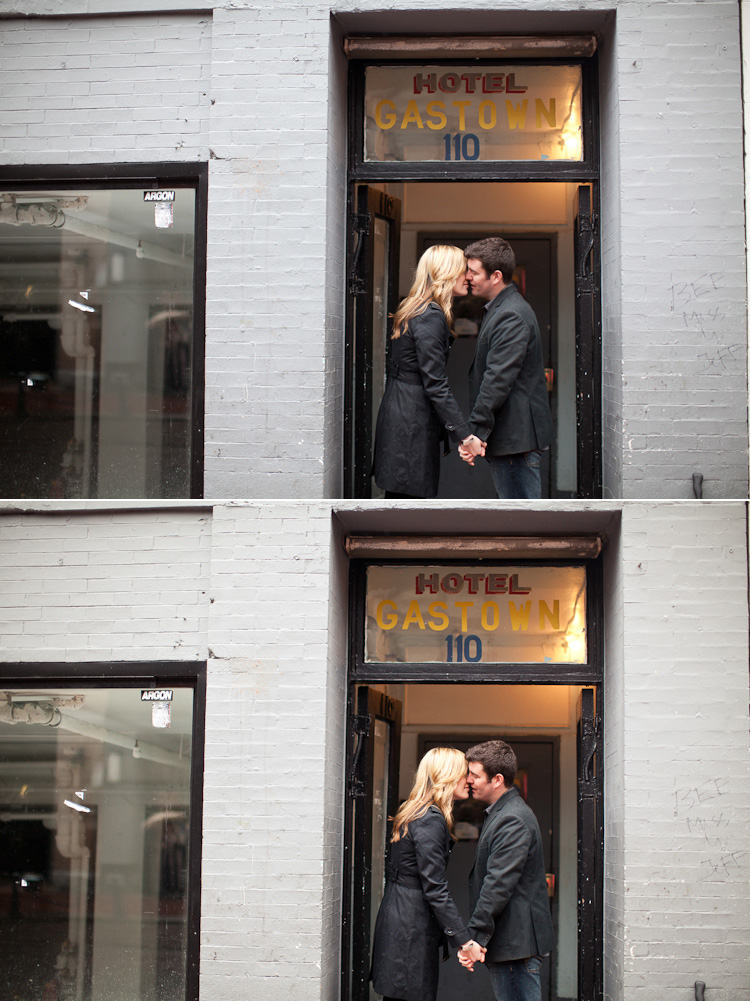
For Stephanie & Patrick’s engagement session in Gastown, we had this wonderful light that an overcast sky provides (even if it meant rain!). Other than my preset, the only other editing adjustment I made to this photo was a slight straighten/crop.

For this image of Dave & Alanna, after I applied the preset I bumped up the fill light to +17 and warmed up the temperature. We shot later in the afternoon, when the sun was lower in the sky and soft. Though they were backlit by the sun, there were vehicles parked behind me that reflected light back onto their faces.

Far & Vincent – white balance remained as shot and exposure was brought down a couple points. Our session was planned for the morning while the sun was soft, and we got this great light bouncing off surrounding windows.
I hope that helps someone out there and if not, send me further questions by emailing or commenting below and I’ll try again next time! Happy Thursday :)
Lindsay says
Great post, thanks! Does the lightroom preset apply the same settings to each photo or does it apply according to what the photo needs? Hope thats not confusing, thanks! Not sure exactly how presets work. :)
Mikaela says
@lindsay – the same preset is applied to all photos and then I go back and adjust things if need be :)
charlene says
Fabulous tips, Mikaela! Curious to know what adjustments you make under split toning – highlights as thats a box i’ve never touched! And it would be amaaazing to have a post written about finding/seeing nice light and natural reflectors. The light in your photos is always so beautiful!!
Hans says
Would love to know what you do under highlights in split tone controls. Do you bump your highlights up brighter and if so how much? I’m curious as I think highlights in my photos would be clipping too bright. Also, what does clarity actually do? (dumb question). Thanks for this post, very informative. I’ve been under the impression that most all photographers work with presets and more in photoshop than lightroom. Your lightroom techniques sound very similar to what I do. I thought I was a loner!
Adriana Morett says
OMG thank you SO much! I love that you keep your editing at minimum and still get those gorgeous colors and light! Thank you for taking the time to do this :)
Falcon says
Thanks for sharing Mikaela! It’s always interesting to see how other photographers edit. I too am a big fan of lightroom! xx
Kelsey says
Oh my gosh, Mikaela! I haven’t visited your blog in a little while so I’m not sure when all the new changes came to be, but it’s absolutely beautiful! I love it!
Mirelis says
Great post! When you do preview > render standard sized previews, is this how you then save them and post on your blog or do you do something else? I use BlogStomp to create the border around my images and then stamp it with my name, but sometimes I have issues resizing accordingly, especially to images I’ve cropped in LR. Please help. I’d love to have something to just resize and then post online.
Thank you.
Dallas says
Mikaela! This is awesome. It’s so inspiring to learn that you do almost all your editing in Lightroom, and that you’ve created such a streamlined workflow. Awesome post.
Kristin Nicole says
Love the clean edits